Click here for this brew session’s recipe…
Sunday, the first of June, was a beautiful and sunny day in Fairfield County – perfect for brewing. I had been planning to make a batch of a Leinenkugle’s Sunset Wheat clone for some time, so I seized the opportunity and fired up the ol’ burners. Since this is the first brew session I am posting, I’ll go into more detail about my process than I would otherwise. If you have any questions, leave a comment and I’ll be happy to answer them!
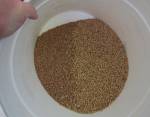
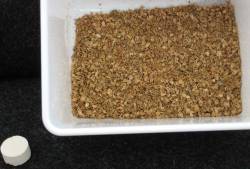
I was aiming for a five gallon batch and used an efficiency setting of 55%. I’m using a Corona mill, which has not been working out very well for me. Even cranked as tightly as possible I am only getting 55-60% efficiency, so I set my recipes to 55% so I can hit my gravities. I’ll be switching mills soon and will have an article about my quest for better efficiency.The recipe called for 50% 2-row pale malt and 50% wheat malt – with my settings, it worked out to 5 lbs of each, which you can see in this bucket.
[side_by_side align=”left”]
[/side_by_side]After spending way too much time out in the sun hand-cranking the Corona mill (another reason I’m switching mills!), I had 10 lbs of grain ready for the mash. The recipe called for a step mash – a protein rest for 15 minutes at 128°F followed by a standard saccharification rest for 45 minutes at 158°F.
A note about protein rests – they are designed to help break down large proteins in moderately-modified malts. This provides several benefits, such as better head retention, reduced chill haze and cloudiness, better wort fermentability, more efficient mash conversion, and a fuller, maltier flavor. However, if you are using fully-modified malt, a protein rest can actually hurt your beer! In fully-modified malt, the work accomplished during the protein rest has already been done during the malting process. Instead of breaking down large proteins, the protein rest will break down the mid-sized proteins you want in the beer. The result can be a very thin, watery beer with no body and head retention.
Most base malt used today is fully-modified, so if you aren’t sure about the particular malt you are using, just skip the protein rest and do a single-step mash. When you do use a protein rest, keep it short – 15-20 minutes or so. Too long a rest will hurt the body and head retention you are trying to increase!
I was using Weyermann pale wheat malt, which is moderately-modified, so I went ahead with the protein rest. Since I currently don’t have a HERMS or RIMS in place (see my cop-out solution, yet to be tested), I decided to mash in my kettle and apply direct heat to reach my steps.
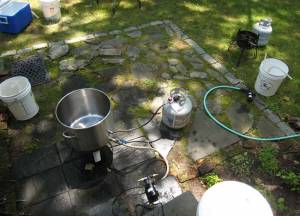
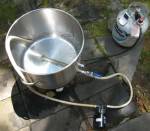
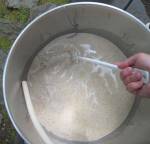
Here is the brewing liquor being heated to strike temperature. Notice the pump, which recirculates from the kettle spigot back into the kettle. I started using it to help with chilling by circulating the wort around the coils of the immersion chiller (based on Jamil Zainasheff’s whirlpool design). I noticed the pump also helps speed up the heating process by keeping the water or wort moving and keeping the temperature even, so now I use it throughout the brew session. Now, pay attention to the bazooka screen attached to the kettle output. I wanted to try recirculating the wort while mashing, so I put it there because I thought it would help keep grain from clogging the output. It wound up doing more harm than good – more on that later.I doughed in with the flame off – you have to be very careful when applying direct heat to a mashtun, since grain scorches very easily. The “doughing in” picture was taken just after I dumped the last of the grain in.
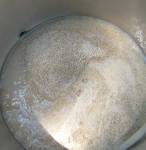
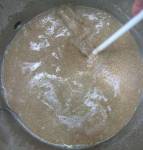
After stirring the mash thoroughly, I switched on the pump. It started off circulating the mash wort at a pretty good rate, but quickly dropped off to a trickle. A quick look revealed grain was clumping up against the bazooka screen and clogging it (I’ll have to see if the same problem happens without the bazooka screen next time). No worries, it was just a test and I didn’t really need the pump for this stage – stirring frequently with my mash paddle worked out just fine. The mash looked very creamy, sort of like milk (see picture below). It smelled wonderful at this point! In 15 minutes, I only had to fire up the burner once to keep it right around 128°F.After the protein rest was done, I turned on the burner again and stirred the mash like crazy until the temperature hit 158°F. I covered the kettle and started tending to other tasks, but I found the heat dropping fairly quickly. In all, I had to fire up the burner and reheat the mash about four or five times throughout the saccharification rest. I would let the temp drop to about 155°F, and then heat it back up to 158°F and repeat. Here’s the mash during the saccharification rest – notice how much darker it looks after the barley kicks in!
[side_by_side]
[/side_by_side]When the mash was complete, I dumped the whole mess into my mashtun so I could vorlauf and lauter (guess I should call it a lauter tun when I mash in the kettle). To my horror, I saw some grain had become compacted underneath the bazooka screen and had scorched onto the bottom of my kettle (no picture, I was too pissed off to worry about that!). I chipped away at it with my mash paddle, scrubbed it with a plastic Dobie-type scrubpad, and got it down to about the size of a quarter. I left it to soak in some PBW and hot water while I performed the vorlauf and lauter.
The vorlauf and lauter went as planned. When vorlaufing wheat beers, don’t go nuts – the wort will always be cloudy. Just vorlauf until there are no grain particles and you’ll be fine. I came back with around 7.5 gallons of sweet wort in two buckets and checked on the kettle. The scorch mark was still there! I spent almost an hour trying different remedies (lemon juice, more PBW, elbow grease) and got it reduced to the size of a dime. Finally, I realized if I didn’t start the boil, this session would go on all night. I said a quick prayer to the beer gods, dumped in the wort, and fired up the burner. I measured the OG of the wort as it was heating up, and came up with 1.031. Then it was time to clean the mashtun…
I still don’t have the precision I need when dealing with volume. BeerSmith said I should have had 6.82 gallons of wort going into the kettle – it was closer to 7.5 gallons. Either my calculations were off (evaporation rate, grain absorption, and mash/lauter tun deadspace being the most likely culprits) or I just measured my strike and sparge water incorrectly, resulting in the overage. Next brew I will have to pay very close attention to volume, and I will probably resort to weighing all liquid to find out where my system is off.
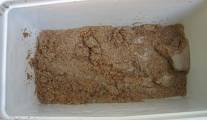
Anyway, the wort was soon boiling away. I turned off the pump (no need for it during the boil) and threw in my first hops addition – 0.5 oz of Cluster hops (seen below) added with 60 minutes remaining. After that, there was nothing to do but wait for awhile.
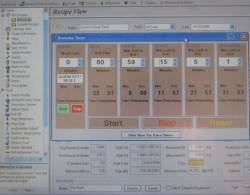
Let me take a moment and plug a great little program called Home Brew Timer. It’s written by Jon Sheldon and is available for free download at Beer Bellies Brew. It’s a great way to keep track of your boil time, alerting you when hops or clarifiers need to be added. You can see Home Brew Timer in the below screenshot, with another great program, BeerSmith, in the background. BeerSmith is like my brewing control center, and I highly recommend it.
I tossed in a Whirfloc tablet (clarifying agent, like Irish Moss) at 20 minutes remaining, and also placed my immersion chiller in the wort so it would have time to heat up and sterilize. At this time, I turned the pump back on so the boiling wort would sterilize the tubing and pump as well. Then it was time to clean up a bit, putting away the equipment I wasn’t using anymore, and measure out the coriander and final hops. I ground up the coriander in a coffee grinder. Man, did that smell nice!
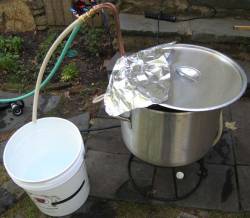
The coriander went in with 5 minutes remaining, and the last hops, another 0.5 oz of Cluster, went in with 1 minute remaining. I turned off the burner and started up the chiller. Here’s a picture of the chilling setup – I run groundwater through the hose into the chiller, and collect it in the bucket. I have a valve on the hose so I can turn it off while I dump the contents of the bucket (I save a bit of the hot output water to clean with later). I cover the kettle with the lid and a bit of loose foil to make sure nothing drops in the wort. With the pump circulating the wort around the chiller, it cools quickly. Within 20 minutes or so, the wort was down to around 68°F and I pumped into the waiting fermentor.
The hydrometer sample clocked in at 1.042 OG, and I ended up with just around 5.25 gallons of wort. My efficiency came out to around 59% – higher than the 55% I had anticipated. This worked out really well, since I was shooting for 5 gallons at 1.041 OG. The boost in efficiency would’ve meant a slightly stronger beer if my volumes were on – but since I overshot the volume as well, I hit my target gravity and wound up with a little extre beer at the right numbers! Sometimes the beer gods smile on you…
I took my starter flask (which had come out of the fridge to adjust to room temperature earlier in the day) and decanted off the spent starter wort, leaving just enough to be able to swirl up the yeast cake on the bottom. I pitched the yeast, covered the fermentor, shook like crazy to aerate, and put it in my fermentation fridge. I saw airlock activity the next morning, and kept the fridge set so that the fermenting wort temperature was around 64°F (usually I have to set the fridge anywhere from 3-6°F cooler than my desired fermentation temp – the fermentation activity creates quite a bit of heat).
A successful brewday – the beer is bubbling away happily, and a sample drawn this past Sunday tasted great! It had a wonderful classic wheat beer flavor, very clean from the Kölsch II yeast, with a lemony spiciness from the coriander. It is currently carbonating in the keg and should be ready to enjoy in a couple of days. One departure from the recipe – I added boysenberry extract instead of blueberry when I kegged. Should be a subtle difference, and I’m curious to see how it will taste.

What kind of pump are you using to re-circulate the hot liquor? Where did you get that from? That sounds like a good idea to try.
I’m using a March pump that I got from Morebeer.com:
http://morebeer.com/view_product/17311//High_Temperature_Polysulphone_Pump
They claim it was custom built just for them by March, but it looks exactly like the March 809 listed @ Northern Brewer:
http://www.northernbrewer.com/allgrain.html
(scroll about halfway down the page)
The March pumps come highly recommended, and I think you’d be OK with any of them – just make sure you get a food-grade pump (and tubing!) which can handle boiling temps. The tubing I use is the Thermoplastic Rubber Tubing from Northern Brewer:
http://www.northernbrewer.com/siphon.html
(second item listed on page)
Hope that helps – let me know if you need any other details, and thanks for stopping by!
Thanks for the answers Loot! Going to add that to my homebrew shopping list.
Wow, thanks for putting so much effort into this post (and all your others for that matter). Being a new brewer I appreciate any tips I can get! I hope this one turns out great and I hope your blog reaches other brewers as well. I just wish I was able to put it on my Google homepage. I don’t know how using RSS works but it sure would be a great addition to the site and hopefully attract more attention to your hard work.
Woops. I just noticed the RSS reader link in the top right! I just missed it at the bottom of each of your posts.
Scott – thanks a lot for the kind words! I write all this stuff and hope someone out there is reading it, and to hear from someone who is (especially a new brewer) is really exciting. Please, feel free to email me or comment here if you ever need help with any brewing stuff – or, if you have an idea for an article that you think would benefit other brewers! I’m always looking for new ideas to write about.
It is trivial to drive your corona with a hand-drill, using a socket adapter and bolt.
Description and pics here:
http://www.mousetrap.net/~mouse/brewing/corona.html
I’m not saying you should go to a roller mill, but if you decide there’s something else you want to do with the other $146 dollars…