May 192011
 

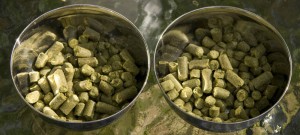
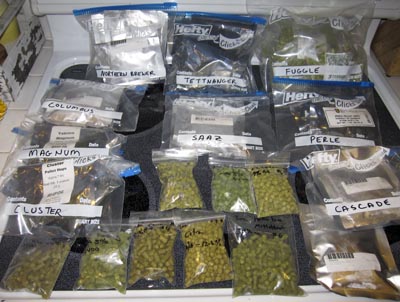
Image of many bags of brewing hops

No, not a drug bust...just inventory day

After suffering through the ridiculously harsh winter we just experienced, I am officially opening the 2011 brew season – better late than never. Following an absence from brewing, I have some rituals I go through to get back on track. I go over notes from my last few brews to see what issues I was trying to deal with. I clean my equipment and replace anything that is past its useful life. And I update my inventory.

That last one is a pain. Last year, I accumulated a lot of ingredients I didn’t get a chance to use. I prefer to use fresh ingredients, but as long as the grain has been stored dry and the hops haven’t left the freezer, I figure they’re good to go. I might make an exception when brewing a really delicate style, but since I haven’t gotten into lagers yet, that hasn’t been an issue.

So, I broke out the scale and notebook and spent an hour or so recording what I have on hand. Here, without further ado, is the starting lineup of the 2011 season:

Grain

Ingredient Quantity
Aromatic malt 1.00#
Black Patent malt 0.50#
Crystal 20L malt 2.00#
Crystal 40L malt 3.00#
Crystal 60L malt 1.75#
Crystal 120L malt 1.00#
Chocolate malt 2.00#
Halcyon 2-row pale malt (UK) 44.50#
Munich malt 6.75#
Pale Chocolate malt 1.25#
Pilsner malt (Germany) 22.00#
Special B malt 1.00#
Special Roast malt 1.50#
Victory malt 1.50#
Vienna malt 4.00#
Wheat malt (Germany) 15.00#
White Wheat malt 0.25#
Hops

Ingredient Quantity
Amarillo hops 2.00oz
Cascade hops 4.00oz
Centennial hops 2.00oz
Chinook hops 2.00oz
Citra hops 2.00oz
Cluster hops 2.00oz
Columbus hops 4.00oz
Fuggles hops (whole leaf) 5.00oz
East Kent Goldings hops 1.25oz
Hallertauer Mittelfrueh hops 4.00oz
Magnum hops 2.00oz
Mt. Hood hops 2.00oz
Northern Brewer hops 6.50oz
Pearle hops 3.00oz
Saaz hops 3.00oz
Tettnang hops 8.00oz
Vanguard hops 1.00oz

There you have it – 114.75 pounds of grain and 53.75 ounces of hops. That’s certainly enough to keep me busy. Let’s hear some recipes to help me get rid of this overstock!

Aug 182010
 

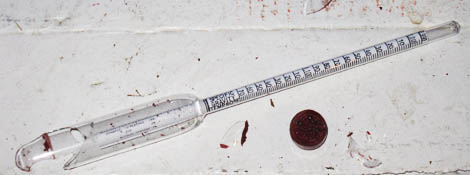
My first hydrometerWell, it was bound to happen eventually.

That picture is of my very first (and only) hydrometer. I got that in the starter kit I bought over five years ago, when I began this long and crazy descent into brewing madness. Over the years, I’ve treated this thing with kid gloves – especially as the time and brew sessions kept adding up. “How cool would it be,” I mused, “to still have that original hydrometer, that connection to my humble beginnings, forever?”

I had planned to eventually retire it, perhaps mount it and hang it over that bar I’m going to build one day. I daydreamed about its last task being the measurement of my first professional wort’s gravity. It served me very well throughout the years, and today, it is no more.

My dear wife accidentally dropped it today when she was helping me clean up some of my brew gear. She feels horrible about it – she knows how much that hydrometer meant to me – and she’s keeping the pieces to make some sort of tribute or memorial to my trusty friend. Perhaps it will still find its rightful place in my personal brewing museum, as time keeps marching on and I try and make this less of a hobby and more of a profession.

However, as I think about it, I can’t be that sad. After all, it’s just a hydrometer – an easily replaceable tool, and one which I have been considering replacing with a refractometer for some time now anyway. When I stop and think about what’s really valuable, what’s been with me since the very beginnings of my brewing journey and what has always encouraged and supported this passion of mine, it’s my wife.

She took me to my first brewery tour at Harpoon in Boston, and we brewed our first beer together. She came with me to pick up the kit, to learn how to use that tricky hydrometer for the first time, and to drink that brew which was the best beer I’d ever had because I had made it myself. And she has put up with the never-ending array of gadgets, freezers, buckets, and CO2 tanks which have taken over our home. She encourages and inspires me, and I truly think that helps me brew better beer more than any tool could.

So, rest in peace, hydrometer. You served me well, and you will not be forgotten. I raise a glass to you tonight – to brews of the past, and the brews of the future you will not be there to measure. However, I shall not be sad, for I still have the really important things in life, and to lose sight of that would be the real tragedy here.

Aug 162010
 

The flags of Köln and DeutschlandThe good news: I now have ten gallons of Kölsch fermenting in my chest freezer (which just BARELY fits two 6.5G plastic buckets inside).

The bad news: In brewing my first 10G batch, I completely botched my water measurements and had a generally sloppy brewday.

OK, so the good news outweighs the bad news – assuming the beer turns out well! I’m glad I was able to rumble through the day and finish with two fermentors full of beer, but I’m mad at myself for fudging my processes…I know, relax, don’t worry, have a homebrew, right?

I measured the water into my mashtun by weighing it, like I have for the last two brews, in an attempt to pinpoint losses and grain absorbtion rates in my system. My big mistake was not weighing the wort runoff – I figured I could estimate the volume based on how many times I filled the 1/2 gallon pitcher I use, but later found out that pitcher is not exactly accurate and holds a bit more than I thought. I can’t say why I chose not to weigh the runoff, but I think it was a mix of laziness and impatience. I’m kicking myself now.

Long story short, I wound up with 15.3G of wort (which I thought was 14.4G). I was quite confused when my 15G kettle wouldn’t hold all the runoff – I figured I had a smaller kettle than I thought I did. Looking back on my notes today and inspecting the pitcher, it became clear that estimating the runoff volume was a huge mistake.

Just to kick a brewer when he’s down, my pump decided to be a pain in the ass, and my pellet hops turned into a solid sludge at the bottom of the kettle, completely blocking my bazooka screen when I was pumping to the fermentors. I’ve never seen pellet hops clump up like that – it was a pretty solid mass! Not sure if that was a result of whirlpooling while chilling or the specific pellets I used (they were Hallertauer, for what it’s worth). I think I’m going to use a hop bag next time.

So, it was a rough session and all my numbers for this brew are a bit fuzzy, but I’m not going to stress about it. I didn’t miss my OG by much, and the beer should turn out just fine. I just wish I could finally reach the nirvana which is truly knowing my system and hitting my numbers every time. For the next session, I will weigh both water in and wort out of the mashtun, and I will make a dipstick to measure kettle volume before and after the boil. There are a lot of variables to pin down, but I hope being overly precise now will give me the data to churn out consistently great beer down the line. I need repeatability, and I will not allow myself to build or buy an automated brew system until I can get this right manually. It’s a frustrating endeavor, but I will get it one of these days…

…and hey, no matter what, I have TWO buckets of beer happily bubbling away!

Aug 122010
 

In trying to decide what my next brew should be, I contemplated many styles. A pumpkin spice ale is definitely on the list, but I want to wait a few weeks until pumpkins are available before attempting that one. I’d love to do another stout, but I’d rather schedule that for colder weather. I need to make another couple batches of my steam beer, which is my flagship house beer, but I can whip that up anytime and I want to try something new.

Enter the Kölsch. I’ve wanted to brew one of these ever since tasting them in Köln, but never got around to it for whatever reason. I think in the back of my mind I associated them with true lagers, and didn’t want to deal with the huge yeast starter and conditioning times. This style is sort of a hybrid in that it ferments at low ale temperatures, but is best with at least four weeks of lagering after primary – not to worry, though, because at my house, lagering is best conducted with pint-sized samples taken every evening.

So, it’s time. I even have stanges for proper serving and everything. I smacked two very old (two years!) Wyeast 2565 smack packs today, and am picking up two more fresh packs this evening. I plan on making a gallon starter with one fresh and two old packs tonight, and pitching that into a 10 gallon batch brewed on Sunday. I’ll keep the second fresh pack in case of stalled fermentation, or for the next batch.

The recipe is going to be 95% German pilsner malt and 5% Vienna, with light Hallertau hopping. The mash will be low (149°F) and long (90 minutes) with a 90 minute boil. This will be my first 10 gallon batch, and the wort will be split into two primaries and fermented at 60°F. I’ll post an exact recipe once I work out the details in BeerSmith.

Jun 212010
 

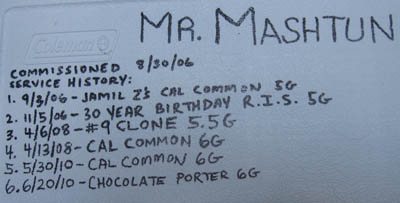
Mr. Mashtun

Mr. Mashtun

If you’ve been keeping up with the blog, you know I’ve been trying my hardest to pin down efficiency losses in my system. I started keeping meticulous records on water in and wort out numbers, going as far as weighing the liquid to be as accurate as possible. When my last brew session clocked in with an efficiency in the mid-50’s, I decided to try changing my mill.

Up until now, I’ve been milling my grain with a Corona (aka Victoria) mill. This is a cheap mill made for grinding corn into flour for tortillas, not necessarily for crushing malt for brewing. There are some die-hard Corona mill supporters out there, claiming they can regularly get in the 80% efficiency range, but I never felt it gave me a good crush. In my experience, it was horribly imprecise, either spitting out uncracked grain or pulverizing both husk and kernel into flour. Add to that the small hopper and manual hand-crank operation, and it was time for a change (yes, you can motorize the Corona fairly easily, but I didn’t think it was worth the effort). I’m not doubting that people get good results with the Corona, but for me, it was too little, too late.

I did a bit of research, and wound up ordering a Barley Crusher mill. This is a highly rated, fairly inexpensive grain mill with two knurled steel rollers designed especially for brewing. I took advantage of the discount pricing BeerSmith is offering and ordered the 15 pound hopper model for $154 (with shipping). When the mill arrived this week, I was excited to try it out for this weekend’s brew.

In a word: amazing. The Barley Crusher took a little adjusting to – I ran a half pound of grain through to break it in, per the instructions, with no issues. Using a power drill which easily attached to the crank, it took about three seconds. However, when I loaded the hopper with 10 pounds of pale malt, the rollers wouldn’t grab the grain and just spun uselessly. A quick search online showed this isn’t an uncommon problem, but one that is easily solved – by loading the hopper with one scoop of grain first, I was able to “prime” the rollers and once they caught, I was free to load the hopper to capacity.

What would have taken me the better part of an hour with the Corona took no more than three minutes with my DeWalt drill and the Barley Crusher. More importantly, however, was the look of the crush – the kernels were all cracked nicely, but the husks were still intact – perfect for setting a filter bed in the mashtun. I crossed my fingers, hoping this would boost my numbers a bit.

I noticed a difference during sparging and lautering – my wort ran clear faster, and I had no hint of a stuck sparge. I measured my pre-boil efficiency and came out over 75% – about a 20% boost just from changing one piece of equipment! Now, my brewhouse efficiency (true efficieny, into the fermentor) dropped quite a bit, but that was due to excess wort losses – I had trouble racking into the fermentor due to a clogged bazooka screen in the kettle (using whole leaf hops without a hop bag = dumb). At the end of the brew, I clocked in at 5 gallons of 1.060 OG wort when I was expecting 6 gallons of 1.061. The volume difference killed my brewhouse efficiency, but my recipe was calculated at an estimate of 70%, so it all balanced out in the end. I’m happy – my last brew came in 18 points under gravity, so this is a major improvement!

I will keep chasing my numbers and reporting back here – if I want to start formulating my own recipes and brewing to consistency, I need to dial in my system exactly. That means getting good sugar extraction from my mash, figuring oiut my evaporation rate, and determining exactly how much water/wort is lost to grain absorbtion and tun/kettle deadspace.

The Chocolate Porter is in the fermentor happily bubbling away (at 68°F, innoculated with the WL San Francisco Lager yeast I cultured from the last batch). I used my new Thomas Fawcett & Sons Halcyon pale malt as the base, and I am expecting nothing short of greatness from this batch! I am also proud to announce that during the mash, I grilled up some traditional Wisconsin-style bratwurst. Below is a picture of them simmering in beer and onions before moving to the grill.
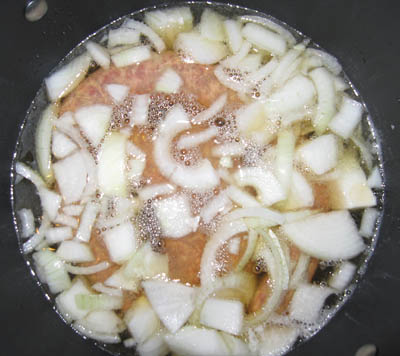
Simmering bratwurst

Simmering bratwurst

The wort sample from the porter tasted dead on, the bratwurst were delicious on a toasted hero with raw onion and brown mustard, and it made slaving away over propane burners in the sweltering heat worth it. Nothing says summer like mixing a brewday with some grilling! Next week, I hope to knock out a new version of the California Common recipe while smoking some of my (semi)famous pulled pork. Speaking of smoking, I have plans to smoke some grain to create a cherry-smoked Hefeweizen and a classic Bamberg Rauchbier.

Tell me about your most recent brewday, your battles with efficiency, and your favorite sausages!

Coming soon, on lootcorp: my new chest freezer, why new beer site BrewAdvice.com needs our help, how to wire up a Ranco temperature controller and save some money, and lootcorp.com’s very first iPhone app!

Prost!
Jun 012010
 

Yeast starter

1.25L yeast starter

It all starts with a starter. Saturday night I cooked up a 1.25L starter to get my yeast ready for a Sunday brewday. Usually I make my starters a week or so in advance, letting them ferment out completely and then crash-cooling them, but this time I decided to try something different. I’ve read that making a starter the night before (or even morning of) brewday allows you to pitch the yeast at their most active. The only downside is you are adding the entire starter volume to your wort, but I figured 1.25L wouldn’t hurt the final product in any meaningful way. The starter preparation went down without a hitch, and I readied for brewing the next morning.

The beginning of the brewday went very slowly – I had to do a lot of cleaning and prep work since my brewery had sat dormant for so long. After a few hours of getting organized, washing equipment, and grinding grain, I was ready to mash in. I was using my recipe for Engine 97 Steam Beer, which calls for mashing at 154°F for one hour. I stirred and measured the mash temperature every 15 minutes.

Mashing in

Mashing in

I batch sparged and wound up with a little over 10 gallons of wort. I had measured my water in and out of the mash very carefully (using a scale to weigh it) since I am trying to lock down the loss numbers for my system. This brew lost appx. 1.5 gallons to grain absorption and another half gallon or so to tun deadspace. These numbers were a bit off from my assumptions, and this (along with poor efficiency) caused me to miss my OG by quite a bit. During the next brew, I will try and pin down my efficiency problems, although I have a suspicion that my Corona mill is to blame.

Starting to boil

Starting to boil

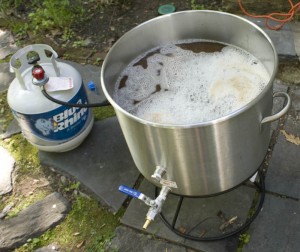
After the mash was complete, I transferred the wort to the kettle for boiling. Everything from here on in was pretty textbook – 90 minute boil, with hops additions at 60m, 15m, and flameout (all Northern Brewer pellets).

Northern Brewer hops

Northern Brewer hops

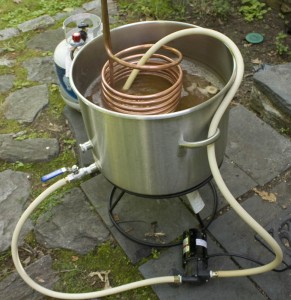
I set up for chilling by adding the IC to the boil with 20m remaining, along with a Whirfloc tablet. I also started recirculating wort through my March pump to sanitize it. The pump is great – it allows me to chill faster by moving the wort around the chiller in the kettle, and then lets me transfer to the fermentor with ease.

I chilled down to about 68°F (took about 20 minutes), racked to the primary, and added the yeast. Set it up in the fermentation fridge to ferment around 58°F. There was airlock activity within 24 hours, and the beer is now happily bubbling away.

Chilling the wort

Chilling the wort

I wound up with an OG of 1.042 (reading taken before adding the starter wort) – my target was 1.055 or so, so this is going to be a bit lighter beer than intended. I wound up with an efficiency of around 55%. I’ll need a few more brew sessions of data before I can really figure out where my losses are occuring, but I am tempted to try the same recipe with malt milled at the homebrew shop to see if I get a big jump. I have a love/hate relationship with my Corona mill, but I just don’t know if it is consistent enough to get a good crush. Seems I am either getting uncracked kernels or flour, and it is very hard to find that middle ground.

I will be using this batch’s yeast cake to brew another few batches of this beer – I have been told the yeast doesn’t reach its peak until the third batch or so. Hopefully I’ll be able to get my system dialed in and have a perfect batch of California Common by that third time around.

May 122010
 

Negra Modelo

Austria via Mexico?

I was in the market for a Vienna Lager, so I took a trip down to the local liquor store and started browsing. I was unable to locate any Austrian beer, so I whipped out the iPhone and loaded up the BJCP 2008 Style Guidelines, checking the entry for 3A – Vienna Lager.

I was quite surprised to find Negra Modelo on the list. I had never really researched the history of Vienna Lagers and it had never occured to me that a Mexican beer would be a documented example of the style. It seems Austrian immigrants brought the style over to Mexico in the 1800s, and darker examples like Negra Modelo are actually closer to the original Vienna Lagers. The style seems to have been widely replaced by the close-but-not-quite Oktoberfest/Märzen style (category 3B) in modern European breweries.

So, here is my review of Negra Modelo – a fine example of this great style, and a fine beer in general!

Aroma
After pouring, the beer smells somewhat nutty and toasty, indicitive that it is balanced towards the malty end of the spectrum. It is an understated yet inviting aroma – no unpleasant or harsh odors detected.

Appearance
The beer pours with a thick, white head which takes a little while to settle. It is a very appealing dark copper color, not surprisingly very similar to an Oktoberfest. The clarity is great – overall, a very impressive looking brew.

Flavor
The flavor keeps me coming back for more. For some reason, I never thought of Negra Modelo as a quality beer. I think I’ve actually avoided it in the past thinking it was swill. However, after giving it a chance, I am pleasantly surprised! True to style, the beer has a strong malt backbone, with some biscuity/toasty flavors rolling around. There are just enough hops to balance the malt out – the hops are not in your face hoppy, but keep the malt from tasting sickeningly sweet. The beer finishes with a slightly bitter aftertaste.

Mouthfeel
Carbonation is on the medium to low side – just enough to create a little bite on the palate. The beer has an overall smooth sensation – medium thickness, enough to coat the mouth slightly. The word “chewy” comes to mind, but not in the super-thick milkshake stout sense.

Overall
I am impressed with this beer – I can’t quite call it a favorite yet, but it has earned a spot on the rotation for future tastings. It is a little heavy for session or summer drinking, so take that into account. Would make a wonderful fall beer (like it’s cousin the Märzen) and would pair nicely with some heavier or spicier foods. If you haven’t tried Negra Modelo, give it a shot – you might be pleasantly surprised!

Apr 082010
 

Dogfish Head

I occasionally get these beer-related press releases, and haven’t posted any because I didn’t feel they were relevant to my audience. However, I recently received one about a Dogfish Head dinner at a restaurant called Chifa in Philly. I am a huge Dogfish Head fan, so I will happily pass the details on to the masses, even though I know nothing of the restaurant and cannot vouch for the glowing reviews. Below is the text, verbatim, from the release (emphasis on beer names added):

CHIFA TO HOST SPECIAL ‘TAX FREE’ BEER DINNER
FEATURING DOGFISH HEAD CRAFT BREWED ALES

PHILADELPHIA, PA – On Thursday, April 15 at 7 p.m., superstar Chef Jose Garces will host a special Beer Dinner at Chifa (707 Chestnut Street, 215-925-5555), his acclaimed Latin-Asian restaurant. The event will feature four courses of Chifa’s inspired cuisine paired with beers from Delaware’s Dogfish Head Brewery. The cost will be $65 per person, excluding gratuity, a fun “tax free” price in celebration of National Tax Day.

Space is limited, and reservations are required.

“Our food at Chifa is particularly well-suited to pairing with full-flavored craft beers, and we’re longtime fans of Dogfish Head’s delicious brews,” says Chef Garces.

Menu items will include: Charred Tasmanian Sea Trout with crispy shiso and flying fish roe, paired with 90-Minute IPA, a big beer with great malt backbone and pungent, but not crushing, hop flavor; Hop-Smoked Poussin with Midas Touch braised daikon and candied ginger, paired with Midas Touch, a wine-mead hybrid that is smooth, sweet and dry, based on a 2,700 year old recipe found in King Midas’ tomb; Lemongrass Short Ribs with massaman curry and pickled limes, paired with Red & White, a big, Belgian-style wit brewed with coriander and orange peel and fermented with Pinot Noir juice, then aged in oak tanks; and Chocolate Ganache with roasted coconut custard and coffee cream, paired with Theobroma, a chocolate beer brewed with Aztec cocoa powder, cocoa nibs, honey, chiles and annatto for a light-colored, flavorful treat.

Chifa opened in early 2009 to critical acclaim; The New York Times praised the restaurant’s unusual ability to “kill two cravings [Asian and Latin] with one dish,” while Philadelphia magazine called Chef Garces’ innovative interpretations of Peruvian cuisine “a cross-cultural thrill ride…A meal at Chifa is a night out, a form of entertainment, an infusion of world culture, a culinary education, something to brag about the following day.”

Chifa is open for dinner seven days a week beginning at 5 p.m.; dinner is served until 10 p.m. Sunday through Thursday and until 12 midnight on Friday and Saturday. Chifa is open for lunch from 11:30 a.m. until 2:30 p.m., Monday through Saturday. For more information about their upcoming beer dinner, or to make a reservation, please visit www.chifarestaurant.com, or call (215) 925-5555.

Sep 162009
 

Autumn leaf

Fall is here!

Wow – I can’t believe Fall is here already! I had a really crappy summer – the weather ruined just about every weekend I had at home, while wedding planning (T -124 days) took up the rest. I look back now and realize how incredible the odds were that every weekend we planned wedding stuff for would be beautiful, and every other weekend would be raining/hurricaning/fire storming. Yea, I can’t win a scratch off Lottery game, but I can defy the laws of probability when it comes to lost brewing opportunities!

Anyway, with Summer 2009 a bust, we look forward pleadingly towards Autumn to right the wrongs Nature has smacked us with. As previously mentioned, I am planning a nice pumpkin spice ale and a porter with the star anise I picked up a few months ago. A couple of questions for discussion and debate –

1. Pumpkin ale – with or without real pumpkin?
2. Star anise in a rich chocolate porter – yay or nay?
3. Have you ever used cardamom in beer? It goes well with tea…
4. Can I somehow work my avocado fetish into one of these beers?

Also, let me know what you have cooking for the Fall and holiday seasons!

Sep 152009
 

iPhone

iPhone - it makes calls, too!

In addition to planning my Fall brews (going to try a pumpkin spiced beer, and make something with that star anise I mentioned last time), I’ve been playing around with developing applications for the iPhone. Naturally, I thought about joining my love of brewing with this new endeavor and making some brewing or beer related apps.

There are already a few brewing apps I’ve seen out there – Joshua Baran created a BJCP Style Guidelines app which is great – searchable, elegant, and free! Also, “nurl” has produced a gem of a brewing app called Brew Pal – this is a steal at $0.99. It is really full-featured, well-supported, and is a lot of fun to use on brewdays. In addition to those two apps (which I own), there are a handful of other offerings out there.

My question to the masses – what kind of brewing/beer apps would YOU like to see? Some brewing calculator or utility app? A beer/bar/brewery related app? Ingredient inventory app? I have a couple of ideas in mind, but I’m curious to see if there is a pressing need out there I could address. Email/comment me with your ideas – if I actually develop it and it hits market, I’ll make sure you get credit for the idea and a free copy of the finished program.