Aug 182011
 

Assistant Brewmaster Bella

My trusty assistant

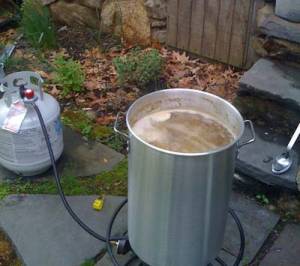
It was a brewing emergency – we had a scant two weeks before some beer-loving guests arrived to spend the weekend at the compound, and our kegs were running critically low! I checked the weather forecast and saw a week of rain – except for Wednesday. Wednesday was forecast to have cloudless skies and plenty of sunshine, an outlier in an otherwise crappy week. I quickly arranged to take the day off of work, grabbed the Assistant Brewmaster Bella, and set out to brew up some witbier.

I’m a big fan of witbiers – they are nice and refreshing on a hot day and are also great bridge beers you can use to expose your macroswill-chugging friends to craft beer without scaring them off. There’s a delicate balance that makes this a challenging brew to pull off correctly. The beer is supposed to have a touch of sweetness (usually present as honey or vanilla notes), moderate citrus fruitiness, some spicy, peppery notes, and a very slight lactic bite in the finish. If any one of these flavors becomes too dominant, the beer will lose the refreshing crispness that wits are known for. Witbiers should also have a somewhat creamy, smooth mouthfeel from the use of wheat and oats in the mash.
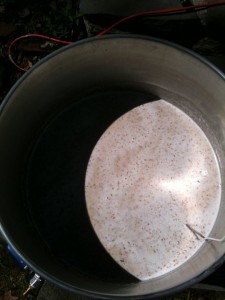
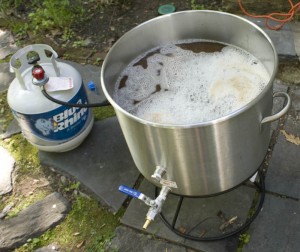
Mashing in the kettle

Mashing in the kettle


The recipe I used called for:

  • 5.5# of Pils malt
  • 5# flaked wheat
  • 2# flaked oats
  • 0.25# Munich malt
  • 1.2oz Hallertau hops @ 60 min
  • 43g citrus zest
  • 11g cracked coriander seeds
  • 1g dried chamomile flowers

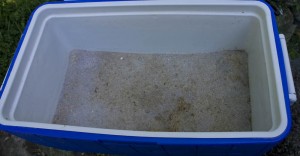
You don’t need to grind flaked wheat and oats, but I threw them in the mill because I’ve heard of slight increases in efficiency when doing so. I mashed in my kettle, since this was a step mash and it’s much easier to do those with direct heat. I used a protein rest at around 124°F for 20 min or so and then brought the temp up to 158°F. The problem with mashing in my kettle is that it loses heat very quickly. I had to fire the burner several times over the mash to keep the temp up, and in reality it fluctuated anywhere between 160°F and 153°F. It spent the bulk of the time in the 156-159°F range, so hopefully there will be no ill effects on the finished product.

I tried a new technique this time – iodine testing for starch conversion. Basically, you buy a bottle of tincture of iodine (available at any pharmacy) and use it to test your mash. Extract a small sample of mash liquid (there should be no grain particles in the sample) in a bowl or something and add a drop of iodine – if it turns black, conversion is not complete. If it stays tan/reddish, you are good to go. My recipe called for a 90 minute mash due to all of the wheat and oats, but testing at 60 minutes showed conversion was done so I mashed out at 168°F. I then added about a half pound of rice hulls to help avoid a stuck sparge.
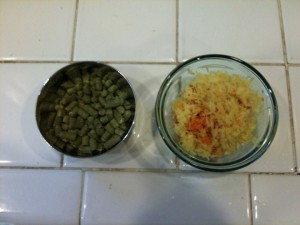
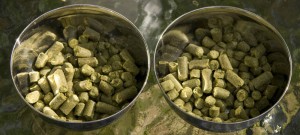
Hops and zest

Hallertau hops and citrus zest

I nailed my pre-boil target exactly – 7G of wort @ 1.042 SG. The rest of the brew went very well, except for one mistake – I miscalculated my evaporation rate. I had been doing 60 minute boils and forgot to compensate for the fact that I was using a 90 minute boil for this recipe. Stupid mistake, and I paid the price. What should have been 5.5G of 1.050 SG wort turned out to be ~4.75G of 1.069 SG wort!!

Well…I made two mistakes here. First was not compensating properly for the longer boil. Second was not testing the gravity during the boil. If I had been keeping an eye on things, I could have added water or reduced the boil time to compensate. However, if I’m going to miss on gravity, I always prefer missing to the upside. When my beers miss high, I just throw the “imperial” tag on them and call it a day!

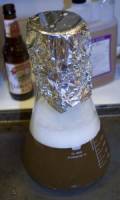
Highlight of the brewday had to be the last five minutes of the boil, when I added in the citrus zest, the chamomile, and the coriander – the wort smelled amazing! I didn’ have time to make a yeast starter for this brew, so I pitched two packs of Wyeast 3944 (Belgian Witbier). Not very cost effective, but the right thing to do in the absence of a proper starter.

All in all, it was a good day and a good brew – I just hope the higher alcohol content doesn’t wreck the balance of the beer. I’ll keep you posted!
May 272011
 

Sometimes you just nail it.

Last weekend’s IPA brewday was one of my best ones yet. All of the water volume data I recorded last year finally paid off big time – my original gravity came in at 1.072 vs an expected 1.071 – my most accurate brew to date! It wasn’t perfect – my mash efficiency came in 5% low (75% vs the expected 80%), and I was still about a half gallon of wort short at the end (5.5 gallons into the fermentor instead of 6) – but the errors were small and effectively cancelled themselves out. Sometimes the brewing gods smile upon you and two wrongs do make a right!

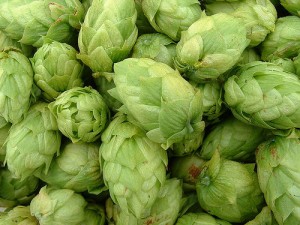
Fresh hops

All of the data I took last year was very helpful in estimating my grain absorption and evaporation rates and tun, kettle and cooling losses. My new water meter made measuring water a snap, and I decided to round all measurements to the quarter gallon. This took a lot of the micro-management out of the water side of things, and I’m very pleased with the results. This was my goal all along – the meticulous collection of data leading to the ability to relax and enjoy the results.

The IPA has been gurgling happily in my fermentation fridge at around 65°F – my basement is actually cooler than that, so I’m using this brewing space heater with a dual stage controller. It’s actually a flat pad you can stick to the wall of the fridge – perfect for maintaining ale temps in a cool basement or during the winter.

Today was the first gravity reading and taste test. The gravity is currently at 1.020 vs an expected final of 1.017, so it has a few more days before I crash cool it. The taste – all I can say is WOW! This is one nice IPA, even when it’s warm and flat! It has a really fragrant hop nose and you think it’s going to clobber you, but with its high starting gravity it comes out very well-balanced. Not too thick of a mouthfeel, a nice, strong malt backbone, and sharp, citrusy hop flavor cutting through it all. Even my wife loved it, and she is not a hophead at all.

You can find the recipe here. Also, I’m looking for a name for this beer – any ideas? Leave a comment or hit me up on Twitter.

Aug 162010
 

The flags of Köln and DeutschlandThe good news: I now have ten gallons of Kölsch fermenting in my chest freezer (which just BARELY fits two 6.5G plastic buckets inside).
The bad news: In brewing my first 10G batch, I completely botched my water measurements and had a generally sloppy brewday.

OK, so the good news outweighs the bad news – assuming the beer turns out well! I’m glad I was able to rumble through the day and finish with two fermentors full of beer, but I’m mad at myself for fudging my processes…I know, relax, don’t worry, have a homebrew, right?

I measured the water into my mashtun by weighing it, like I have for the last two brews, in an attempt to pinpoint losses and grain absorbtion rates in my system. My big mistake was not weighing the wort runoff – I figured I could estimate the volume based on how many times I filled the 1/2 gallon pitcher I use, but later found out that pitcher is not exactly accurate and holds a bit more than I thought. I can’t say why I chose not to weigh the runoff, but I think it was a mix of laziness and impatience. I’m kicking myself now.

Long story short, I wound up with 15.3G of wort (which I thought was 14.4G). I was quite confused when my 15G kettle wouldn’t hold all the runoff – I figured I had a smaller kettle than I thought I did. Looking back on my notes today and inspecting the pitcher, it became clear that estimating the runoff volume was a huge mistake.

Just to kick a brewer when he’s down, my pump decided to be a pain in the ass, and my pellet hops turned into a solid sludge at the bottom of the kettle, completely blocking my bazooka screen when I was pumping to the fermentors. I’ve never seen pellet hops clump up like that – it was a pretty solid mass! Not sure if that was a result of whirlpooling while chilling or the specific pellets I used (they were Hallertauer, for what it’s worth). I think I’m going to use a hop bag next time.

So, it was a rough session and all my numbers for this brew are a bit fuzzy, but I’m not going to stress about it. I didn’t miss my OG by much, and the beer should turn out just fine. I just wish I could finally reach the nirvana which is truly knowing my system and hitting my numbers every time. For the next session, I will weigh both water in and wort out of the mashtun, and I will make a dipstick to measure kettle volume before and after the boil. There are a lot of variables to pin down, but I hope being overly precise now will give me the data to churn out consistently great beer down the line. I need repeatability, and I will not allow myself to build or buy an automated brew system until I can get this right manually. It’s a frustrating endeavor, but I will get it one of these days…

…and hey, no matter what, I have TWO buckets of beer happily bubbling away!

Jun 212010
 

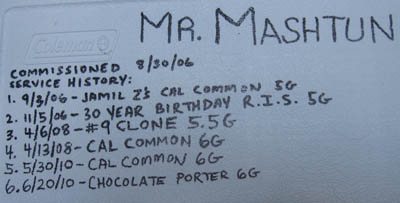
Mr. Mashtun

Mr. Mashtun

If you’ve been keeping up with the blog, you know I’ve been trying my hardest to pin down efficiency losses in my system. I started keeping meticulous records on water in and wort out numbers, going as far as weighing the liquid to be as accurate as possible. When my last brew session clocked in with an efficiency in the mid-50’s, I decided to try changing my mill.

Up until now, I’ve been milling my grain with a Corona (aka Victoria) mill. This is a cheap mill made for grinding corn into flour for tortillas, not necessarily for crushing malt for brewing. There are some die-hard Corona mill supporters out there, claiming they can regularly get in the 80% efficiency range, but I never felt it gave me a good crush. In my experience, it was horribly imprecise, either spitting out uncracked grain or pulverizing both husk and kernel into flour. Add to that the small hopper and manual hand-crank operation, and it was time for a change (yes, you can motorize the Corona fairly easily, but I didn’t think it was worth the effort). I’m not doubting that people get good results with the Corona, but for me, it was too little, too late.

I did a bit of research, and wound up ordering a Barley Crusher mill. This is a highly rated, fairly inexpensive grain mill with two knurled steel rollers designed especially for brewing. I took advantage of the discount pricing BeerSmith is offering and ordered the 15 pound hopper model for $154 (with shipping). When the mill arrived this week, I was excited to try it out for this weekend’s brew.

In a word: amazing. The Barley Crusher took a little adjusting to – I ran a half pound of grain through to break it in, per the instructions, with no issues. Using a power drill which easily attached to the crank, it took about three seconds. However, when I loaded the hopper with 10 pounds of pale malt, the rollers wouldn’t grab the grain and just spun uselessly. A quick search online showed this isn’t an uncommon problem, but one that is easily solved – by loading the hopper with one scoop of grain first, I was able to “prime” the rollers and once they caught, I was free to load the hopper to capacity.

What would have taken me the better part of an hour with the Corona took no more than three minutes with my DeWalt drill and the Barley Crusher. More importantly, however, was the look of the crush – the kernels were all cracked nicely, but the husks were still intact – perfect for setting a filter bed in the mashtun. I crossed my fingers, hoping this would boost my numbers a bit.

I noticed a difference during sparging and lautering – my wort ran clear faster, and I had no hint of a stuck sparge. I measured my pre-boil efficiency and came out over 75% – about a 20% boost just from changing one piece of equipment! Now, my brewhouse efficiency (true efficieny, into the fermentor) dropped quite a bit, but that was due to excess wort losses – I had trouble racking into the fermentor due to a clogged bazooka screen in the kettle (using whole leaf hops without a hop bag = dumb). At the end of the brew, I clocked in at 5 gallons of 1.060 OG wort when I was expecting 6 gallons of 1.061. The volume difference killed my brewhouse efficiency, but my recipe was calculated at an estimate of 70%, so it all balanced out in the end. I’m happy – my last brew came in 18 points under gravity, so this is a major improvement!

I will keep chasing my numbers and reporting back here – if I want to start formulating my own recipes and brewing to consistency, I need to dial in my system exactly. That means getting good sugar extraction from my mash, figuring oiut my evaporation rate, and determining exactly how much water/wort is lost to grain absorbtion and tun/kettle deadspace.

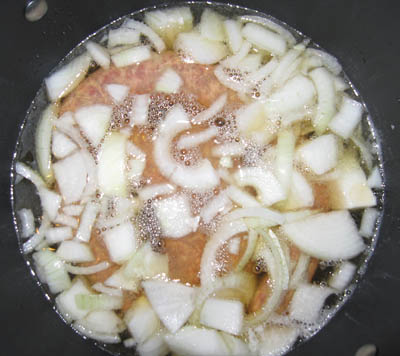
The Chocolate Porter is in the fermentor happily bubbling away (at 68°F, innoculated with the WL San Francisco Lager yeast I cultured from the last batch). I used my new Thomas Fawcett & Sons Halcyon pale malt as the base, and I am expecting nothing short of greatness from this batch! I am also proud to announce that during the mash, I grilled up some traditional Wisconsin-style bratwurst. Below is a picture of them simmering in beer and onions before moving to the grill.

Simmering bratwurst

Simmering bratwurst

The wort sample from the porter tasted dead on, the bratwurst were delicious on a toasted hero with raw onion and brown mustard, and it made slaving away over propane burners in the sweltering heat worth it. Nothing says summer like mixing a brewday with some grilling! Next week, I hope to knock out a new version of the California Common recipe while smoking some of my (semi)famous pulled pork. Speaking of smoking, I have plans to smoke some grain to create a cherry-smoked Hefeweizen and a classic Bamberg Rauchbier.

Tell me about your most recent brewday, your battles with efficiency, and your favorite sausages!

Coming soon, on lootcorp: my new chest freezer, why new beer site BrewAdvice.com needs our help, how to wire up a Ranco temperature controller and save some money, and lootcorp.com’s very first iPhone app!

Prost!

Jun 012010
 

Yeast starter

1.25L yeast starter

It all starts with a starter. Saturday night I cooked up a 1.25L starter to get my yeast ready for a Sunday brewday. Usually I make my starters a week or so in advance, letting them ferment out completely and then crash-cooling them, but this time I decided to try something different. I’ve read that making a starter the night before (or even morning of) brewday allows you to pitch the yeast at their most active. The only downside is you are adding the entire starter volume to your wort, but I figured 1.25L wouldn’t hurt the final product in any meaningful way. The starter preparation went down without a hitch, and I readied for brewing the next morning.

The beginning of the brewday went very slowly – I had to do a lot of cleaning and prep work since my brewery had sat dormant for so long. After a few hours of getting organized, washing equipment, and grinding grain, I was ready to mash in. I was using my recipe for Engine 97 Steam Beer, which calls for mashing at 154°F for one hour. I stirred and measured the mash temperature every 15 minutes.

Mashing in

Mashing in

I batch sparged and wound up with a little over 10 gallons of wort. I had measured my water in and out of the mash very carefully (using a scale to weigh it) since I am trying to lock down the loss numbers for my system. This brew lost appx. 1.5 gallons to grain absorption and another half gallon or so to tun deadspace. These numbers were a bit off from my assumptions, and this (along with poor efficiency) caused me to miss my OG by quite a bit. During the next brew, I will try and pin down my efficiency problems, although I have a suspicion that my Corona mill is to blame.

Starting to boil

Starting to boil

After the mash was complete, I transferred the wort to the kettle for boiling. Everything from here on in was pretty textbook – 90 minute boil, with hops additions at 60m, 15m, and flameout (all Northern Brewer pellets).

Northern Brewer hops

Northern Brewer hops

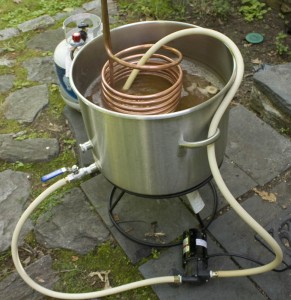
I set up for chilling by adding the IC to the boil with 20m remaining, along with a Whirfloc tablet. I also started recirculating wort through my March pump to sanitize it. The pump is great – it allows me to chill faster by moving the wort around the chiller in the kettle, and then lets me transfer to the fermentor with ease.

I chilled down to about 68°F (took about 20 minutes), racked to the primary, and added the yeast. Set it up in the fermentation fridge to ferment around 58°F. There was airlock activity within 24 hours, and the beer is now happily bubbling away.

Chilling the wort

Chilling the wort

I wound up with an OG of 1.042 (reading taken before adding the starter wort) – my target was 1.055 or so, so this is going to be a bit lighter beer than intended. I wound up with an efficiency of around 55%. I’ll need a few more brew sessions of data before I can really figure out where my losses are occuring, but I am tempted to try the same recipe with malt milled at the homebrew shop to see if I get a big jump. I have a love/hate relationship with my Corona mill, but I just don’t know if it is consistent enough to get a good crush. Seems I am either getting uncracked kernels or flour, and it is very hard to find that middle ground.

I will be using this batch’s yeast cake to brew another few batches of this beer – I have been told the yeast doesn’t reach its peak until the third batch or so. Hopefully I’ll be able to get my system dialed in and have a perfect batch of California Common by that third time around.

May 102009
 

Boiling the wort

Boiling the wort

First off, Happy Mother’s Day to any moms out there! I’ll drink one in your honor tonight!

Yesterday was a very productive brewing day. I woke up to heavy rain and resigned myself to having to postpone yet another brew. However, a couple of hours later the rain had stopped and I thought the day had a chance of clearing up. I decided to plan a quick extract brew, hoping to sneak it in before the weather turned again.

I ran out to Maltose and picked up some ingredients – 6.6# of wheat LME, an ounce of Vanguard hops, a pack of Wyeast German Wheat, and a pound of Orange Blossom honey. My recipe was a slightly modified version of the Wildflower Wheat found in Sam Calagione’s book Extreme Brewing. I couldn’t find chamomile anywhere, so I planned on using some dried elderflower I had at home. I couldn’t find the elderflower, so I settled on some Grains of Paradise instead, hoping it would give a touch of peppery citrus to the finished beer.

A few hours later, I had five gallons of beer sitting in the fermentor. The brewday was perfect – the weather turned beautiful, everything went smoothly, and doing an extract brew saved me a bunch of time. I did a full boil in my aluminum kettle (which usually serves as my HLT) – just didn’t feel like breaking out the huge kettle when I had the smaller one ready to go.

The wort was treated to a 60m boil, with hops added at 60m, honey and Whirfloc at 10m, and spices at 1m. Since I was using the smaller kettle, I didn’t have my evaporation rate nailed down. I finished up with around 5.75G of wort, chilled down to 64ºF, and pitched my yeast. I was expecting a very short lag time since the date on the smackpack was only five days old (think that’s the freshest I’ve ever gotten!). This morning I still had no airlock activity, but upon closer inspection that was due to a loose gasket around the airlock. I wrapped the airlock with some sanitized teflon tape and wedged it in there. Problem solved, and now this beer is fermenting like crazy!

Original gravity clocked in at 1.047 (right on target – man, that 100% efficiency with extract is a nice change of pace!!) and I anticipate kegging in about two weeks. I may decide to throw some fruit extract in after primary – depends on how much of the delicate spice and orange honey flavor comes through. I also have the Old Speckled Hen clone nearing completion – I’ll probably be kegging that up next weekend, as well as starting a wine kit (Shiraz) I’ve been sitting on. Shaping out to be a very nice Spring so far!

May 042009
 

Well, thanks to our gracious hosts J-Dawg & Mike , my brewing drought is over and the first batch of 2009 is bubbling away! The group brew was a great time – eleven people turned out, four batches of beer were brought into the world, and numerous microbrews and homemade Buffalo wings were devoured by all.

A rainy day did not slow us down as J-Dawg & Mike’s spacious garage gave us the shelter we needed to get on with the festivities. I was brewing an Old Specklen Hen clone I picked up from Maltose Express. I got a bit of a late start because I was busy drinking beer and chatting, but once we got underway it was smooth sailing. It was a pleasure to take a break from the complexity of an all grain brew – I didn’t measure, didn’t take any gravity readings, just followed the directions in the kit (ha!) and concentrated on having a good time.

My Big Brew setup

My Big Brew setup

Continue reading »

Jun 102008
 

Click here for this brew session’s recipe…

Sunday, the first of June, was a beautiful and sunny day in Fairfield County – perfect for brewing. I had been planning to make a batch of a Leinenkugle’s Sunset Wheat clone for some time, so I seized the opportunity and fired up the ol’ burners. Since this is the first brew session I am posting, I’ll go into more detail about my process than I would otherwise. If you have any questions, leave a comment and I’ll be happy to answer them!

Brewday equipment

My brewday setup

Continue reading »